Parmigiani

Parmigiani
Take me to the Parmigiani blog!

Friday, October 29, 2010

US National Parks: The Grand Canyon

The Grand Canyon...huge, monstrous canyon, measuring some 280 miles (446km) long and some 18 miles (29km) wide in some areas. I figure, we can put all of Singapore, lengthwise across the North and South Rim, with space to spare. Afterall, Singapore is 225 sq miles, and the Grand Canyon 1904 sq miles, an area approximately 9 times the size of our small island.

The mighty Colorado river runs through it, some one mile (1.8km) from the ridges of the canyon. This is a truly magnificent landscape. Huge, cavernous, and very well organized, with lookouts nicely marked. And numerous signs showing the peaks. Many of the peaks look very similar to the uninitiated, and I have named some of the peaks...but not always sure they are correct.

First a sweeping view of the entire canyon, shot from Grandview Point (7399ft, 2256m)...this is a 6 panel panorama with the 80mm lens (normal), stitched. The intent of this panorama, printed at full resolution 300dpi will be some 10 ft (3m) wide and 18 inches (about 0.6m) tall. As noted elsewhere in this blog, doubling these dimensions is easily attained with no loss of clarity or resolution. Printed like so, the panorama presents the viewer with an 180+ degree view, and allows the viewer to draw himself into the picture, parts of the image each time. Click on the image for a larger...1080 pixels high image. Note large image is 3.6MB, but need to be seen at minimum that resolution for some impact. Large prints will be even more interesting.


I selected the Hasselblad HC2.8/80 lens, which provides an almost normal perspective with each frame. This is approximately equal to the field of view from a 50mm lens in a regular full frame 35mm dslr like the Canon EOS 5dii.

Metering for stitching has to be done manually. And in scenes where some part of the final image is in strong sunlight, and others in deep shadows present significant technical challenges to the photographer. For this image, I elected to meter for the peaks on the Temples of the Grand Canyon to be somewhat in zone 5. This allowed the bright clouds to be placed in zone 8, perhaps 9. And the dark crevices of shadow in the canyon to be in zone 1. Stitching is done with a geniometric head, level carefully in 3 axes so that panning does not add any geometric distortions to the image. I use the Photoclam Multiflex head, which allows micrometric adjustments to be made in any of the 3 axes. A macro focussing rail is used to set to pivot at the exact entrance pupil of the lens, in this case 79mm from the sensor position. 6 frames are exposed using this technique, carefully making sure that there is at least a 20% overlap between frames.

The image is roughly processed (default values used) in Phocus, and exported as a Layers PSD file, to CS4 for alignment and panorama stacking. The resultant image is adjusted for levels, and slight sharpening. Note the full resolution is far more than can be displayed on a computer screen. For example, the film crew perched on the rock at almost far left foreground can be fully resolved in a full sized print.

Another image, made from 8 panels from Yavapai Point (7262ft, 2213m), using the same equipment and technique. Metering was selected by placing the darker portions of the clouds in zone 5. This placed the cliffs on the scene left in zone 8. And the tourists at far right in zone 1. You can make out the tourists sitting in a row in the larger picture.


As we were there, a shower hit the canyon...passing through quickly, as strong winds carried the clouds. A rainbow appeared...


Metering for this was simple. As I was fearful that the rainbow would disappear, I elected to use the camera's Average Metering mode, and made this exposure using AE at f/16. After the fact, as it turns out, this placed the brightest parts of the landscape at zone 9, and the clouds, brooding and dark at zone 2.

Another view of the canyon...note two lovers looking into the sunset...not a posed shot.


To enable sufficient light to fall on these 2 human subjects, I metered for the gir's white top to be in zone 6/7. This placed the protuding rock at the lower part of the center also in zone 5. And plunged the clouds into a brooding darkness, but with the bottom catching the last rays of the setting sun, turning golden.

More detailed studies of the various Hindu named peaks next.

Prints in various sizes available. Prints of the panoramas up to 6m wide are possible. Please contact me.

Tuesday, October 26, 2010

US National Parks: Antelope Canyon

Antelope Canyon...a natural wonder. About 5 miles off the town of Page, the canyons have held thousands of photographers and tourists with its charming and wonderful shapes and hues. As it was within the Navajo Indian Reservation, American Indian guides are required. For the Upper Canyon, these tours take about an hour. For photographers who want to spend a bit more time inside the canyons, a longer Photographer's tour is offered. I took the Photographer Tour. Chief Tootsie, who apparently runs one of the largest agencies in the area is the promoter. The tours start at Page downtown, and tourists and photographers are carried on 4WH trucks on road to the canyon. But the last 3 miles or so, is on unpaved, desert dust ground...and undulating.

The photographer's tour, though still better than the regular one, proved disappointing. The Navajo are perhaps being too greedy, letting in too many tourists into the canyons...supposedly their sacred grounds. As a result, the tour was very crowded...very difficult to shoot pics without someone kicking your tripod or moving into the picture.

The Upper Canyon is wide, and the sandy floor of the canyon an easy walk.

The tonality of the sandstone walls and its wierd and wonderful shapes are fascinating. At mid-day, light from the sun comes into the canyon in the form of light shafts, famous in their own right. The Navajo guides throw sand into the light, causing it to disperse and show up in pics as light shafts. Beautiful.


Metering was done to place the highlight on the canyon wall at Zone 5. This meant that the spot where the light shaft fell became overexposed at Zone 10+. But to preserve the tonality of the image, and to show shadow detail, which fell on Zone 2, I had little choice. Exposure at ISO50 was in the region of 0.2s at f/22. You can see a Navajo guide at the extreme right of the picture. I could have cropped him out, but left him there to show the situation. For prints, I will have the guide cropped out. Such is the crowd. I had so few pictures of the Upper Antelope, these 2 technically deficient ones are the only ones I have.

The fine sand is also a nightmare to the equipment. The sand was as fine as talc, and thrown into the air, it permeates everything. I felt the sand in my lungs, mouth, throat, and of course it would settle on camera gear. My shooting partner, who shot sans protection, had his Canon 5Dmk2 and 17-40L covered in sand...including the insides of the zoom...making it feel a bit gritty to move. He reports, happilly though, this is easily cleaned with a bottle of compressed air back at the hotel.

But as for my equipment, I did not want to take any chances. I had earlier corresponded with several people who had shot there, as well as Hasselblad in Sweden - fearing that the dust would enter my camera and lenses. Afterall the H3D features an air cooled back...air is actually sucked in by a fan and circulated around the back to cool it. I was afraid that drawing air into the sensor would make it unusable. I was recommended to either wrap the camera and lens in Saran or get Kata KT702 Elements Cover. Saran wrap was a cheap solution, but I feared overheating. So I went with the Kata and it worked wonderfully. I found hardly any sand inside the enclosure.

Another view of the Upper Antelope, this shot taken almost directly up into the sky.


I metered at the middle rock to place it in Zone 5. This meant the sky at the top of the picture would blow out beyond Zone 10. But I had wanted the shadow areas on the rock left of the frame to show detail and texture, hence placed them on Zone 1 or 2. Notice also the light, because it is reflected off the walls, has a blueish hue on the shadow areas, but the parts bathed in more direct light like in the lower middle of the frame, shows a beautiful golden glow. I love the play of light, and the tones it creates, as well as the abstract shapes and lines within the sandstone.

These canyons are created by flash floods, where the rushing waters carve the intricate, amazing curves on the sides of the rock. The Navajo consider this as sacred ground.

The color and gradations of tone are as fascinating as are the shapes of the walls.

I also went over to Lower Antelope Canyon, just across the road, some 2km away. Here, there were far less crowds. And with a photographer pass, I can stay within the canyons for up to 4 hours, shooting as I wish. Allowing guided groups to pass. The canyon closes at 4:30pm, so we needed to be out of there before dark.


The tonality of the walls and the shapes are no less intriguing. In this shot, I placed the wall left of the frame at middle Zone 5. This meant that the sky, peeking into the center of the image as a crack would blow out. You can also observe the blue tinge on the shadows. Lens flare from the HCD 4/28 can also be seen as a rainbow like flash. I don't think this strategy of metering was very successful in this picture, but I decided to show it as a negative example.


The next image above, in my opinion is better. I had metered to place the middle of the image. This again caused the bit of sky peeking into the frame at the top to blow out. But this metering scheme placed the bright spot where direct sunlight hit the canyon walls at Zone 10, perhaps a bit beyond. In looking at the raw file, the underside of the rock on the left was in the deep shadows - zone 8+ to 9. Using the Phocus tools, I can recover the shadow details. I also could have recover some sky detail, but decided to let this part blow slightly, to give the impression of intense light coming in. This exposure scheme allowed me to place the wall left at a final expoure of Zone 3 or perhaps 2. Giving it dimension and allowing the striations to show, and the tonality to reveal itself.

The next image was my favourite.


I also placed Zone 5 at smack center of the frame. This allowed the sunlight to cast a beautiful tone on the canyon walls in the background. The lines on the walls making a beautiful abstract. It also placed the foreground object...some debris of branches of dead trees to fall in Zone 9, highlighting it. This image needs to be seen larger. Please click for a 1920 wide sample. And when printed to 40"x30", it is spectacular.

Some parts of Lower Antelope are so narrow, one can hardly squeeze into it. And Lower Antelope requires some climbing - ascending and descending steel stairs, while Upper Antelope is completely flat within the canyon walls.

The geology of Lower Antelope is different from Upper Antelope. The beads you see, punctuating the walls are iron deposits.


This image was much easier to achieve. The entire tonal range can be captured within the dynamic range of the back, and merely metering to place the middle of the frame at Zone 5 allowed the entire image to fall within the other reproducable zones. I included this image to show the tight spaces one has to squeeze through in Lower Antelope...the space barely 2 feet between the walls. The tonality of the image is also rather even, perhaps making a slightly boring image.


Exiting the canyon, I shot this self portrait of my shadow in the 4pm sun...

Friday, October 22, 2010

US National Parks, Horseshoe Bend, Page Arizona

As we drove out of Yosemite, we headed for Arizona, for Page.

Just off the highway, about 2 miles from the town of Page, is a geological curiosity, and a photographer's haven called Horseshoe Bend.

The Colorado River negotiates an almost 360 degree turn around this large rock, just downstream of the Glen Canyon Dam, and Lake Powell. As the river and the rock is part of the Glen Canyon National Recreation Area, it is open to boating and camping.

The lookout is rather terrifying, my tripod is positioned some 1000 ft (about 320m) above the Colorado River. This is quite a scary thing...there are no barriers between you and the sheer drop.


From the lookout point, photographers and tourists alike stand, sit, squat at a few protuding rocks to admire the unique landscape. To shoot this picture, I selected the ultra-wide Hasselblad HCD4/28 lens, which provides approximately 90deg diagonal field of view, approximately what a 21mm would give on a 35mm full frame dslr. I selected this lens for two reasons: firstly it allowed me to take in the entire view in one go. Secondly, and perhaps more importantly, it provided me with a perspective which suggest a vertigo effect with the awesome drop. Stitching with a 80mm lens, which provides a normal perspective would rob me of the ability to convey this.

I metered to place the rock in zone 5. This photograph was taken about an hour before sunset, the sun itself was just about off the frame on the top. I shaded the lens, careful not to cause it to vignett with a hat. You can still see some detail on the far background, but that part of the image would have fallen at Zone 9 or 10, hence a slight haze can be seen. The sun itself is off frame. The red of the light makes a more aggressive looking rock. The colours were enhanced slightly by pushing the saturation in CS4 slightly. The 1024 wide picture shows a bit more sky, and on clicking, the 1920 wide image, being 16:10 in aspect allows me to crop the sky out.


But the image left me a bit dissatisfied to suggest vertigo. I tried again, later in the evening, with an even larger field of view.


I elected to remain with the 28mm, but stitch 3 frames to form one panorama. I could have covered the scene with perhaps 4 shots from the HC2.8/80, a lens which would provide a normal field of view, as would a 50mm on a DSLR. But I wanted to make the perspective even more scary...to draw the viewer into the immense drop, while allowing him to admire the details. To provide this perspective, I had to remain with the 28mm lens instead of the 80mm, but to include more of the sides. This squeezing of the scene exggarated the perspective even more, and makes a stronger image, suggesting vertigo to some people, especially the larger image when clicked or when printed full size. A friend of mine told me that he had an urge to jump by looking at the image, so he can experience the textures as he enters the image.

Shot just minutes before sunset, the light was failing and changing fast, but you can see the sky is totally blown out, as the sun was setting directly across from us, and in the frame. The golden rays catching the sides of the canyon making it glow. The rock itself is in shadows. I wanted to capture this almost dusk feel for the image, so I metered the sky as zone 10. The sun is actually just about smack in the middle of the picture...but metering the sky at zone 10, meant that the brighter sun was blown out in the sky...erasing it from the image with a featureless, white sky. I cropped the sky out a bit, so the expanse of white is less threatening. This exposure scheme, allowed the rock to be placed in zone 3, and the sides of the banks at zone 5. This, I believe captures the visualization I had in my mind's eye of the scene, as it was dusk.

I am undecided if I prefer the darker dusk photograph or the brighter one. Both are of the same subject, same shooting position, but treated differently in shooting techniques, resulting in two photographs with vastly different emotional impact. Which one do you prefer?

A view of the people around the side...looks dangerous? it is! its a sheer drop of 1000ft, with no barriers between you and the edge of the cliff.


and just for fun...my transport during the SouthWest USA tour...we clocked some 3000 miles on this SUV...Ford Explorer. Shot minutes after sunset in Page, at the car park leading to Horseshoe Bend.

Tuesday, October 19, 2010

US National Parks: Yosemite El Capitan

El Capitan, elevation 7569ft (2307m)...its name is imposing itself. A sheer piece of granite, rising 900m above the valley floor in one vertical face. Certainly not the highest peak in Yosemite, but one of the most dangerous to climg, and definitely one which almost forces itself on the viewer, due to the sheer face of the rock.

From the valley floor, the Merced River flows...at this time of the year, it is but a small stream. This shot was taken from the south bank, just before the turning at at the valley floor to the path which splits between continuing on the loop or right into Wawona. We found some respite from the summer heat in a cool pond...the water levels were low this September...I heard there was record water flow in the falls and rivers during the summer.

Here, a view of El Capitan on the left, and the Cathederal Rocks on the right, almost reflecting in the calm waters. I did develop another version of this shot, with a digital soft grad ND filter on the sky, but decided to leave the image alone as I had visualized this as a bright, light feel when I saw the scene.

I metered to place El Capitan at about Zone 9, and allowed the rest of the scene to fall in place.


From just a couple of meters upstream, I shot this next shot, zooming in on just El Capitan and its surroundings, in portrait mode. Balanced with the water in the foreground, the imposing mountain looks in stark contrast to the inviting river waters in comparison to the hard, sheer rock.


I selected the 28mm lens, and framed to include some branches of the trees at the upper cornerst o give reference to the scale: a treatment which use the foreground/background relationship to establish scale and distance. The trees at the foot of the mountain are huge pines, towering some 100m above the ground.

Metering was taken using the main subject as the source. I wanted to place the lightest part of El Capitan almost at the white limit - suggesting that it almost shone in the sunlight, as it did that day. I placed the brightest at Zone 9. The 16 bit afforded by the medium format back meant that I had sufficient exposure lattitude without having to resort to a graduated filter which would have been typically employed in the film days, or even with a 14 bit 35mm digital camera. But the Hasselblad had sufficient dynamic range to cover details both in the shining rock, and the dark shadows. Using this metering scheme, the darkest parts of the of the rocks and water at the lower right registered Zone 1. This allowed the lower left to have the sunlight flirting with the water...crystaline clear, showing the rocks.

(the Gallery Frames were done by scripts written by Joe Colson)

The next shot, taken from El Capitan Meadows, showing a detail of the South West face and intended to give the impression of a forbidding presence. Strong, powerful. This is a 2 panel stitch from a panorama with about 50% overlapping images. Shot with the 120mm lens. Exposed such that the shadows of the cracks within the rock is in Zone 5.

Saturday, October 16, 2010

To Dodge or not to dodge?

To burn or not to burn

Special weekend article, as I am troubled with this image that I have shown this image of the Yosemite valley as seen from Tunnel View already earlier this week.

I am a bit troubled with the triangular patch on the right hand side. The lattitude of an 8 bit display device like the computer screen is not sufficient to show the tones within the shadow. And as I read and re-read some of the articles by Ansel Adams, especially Moon over Hernandez, where he describes revisiting the negatives and reprinting them...when he revisited Moon over Hernandez, he printed the sky darker than he did originally.

He advocated the use of dodge and burn quite extensively in his printing. Many pages of his book "The Print" is dedicated to this. And I thought, perhaps this image might benefit from using a dodge technique to bring out some detail in the shadow areas on the bottom right.

Here is the original:


And a very simple process to experiment, using the dodge tool in CS4 to simulate the same during printing of a negative. I did this non-destructively on a duplicate layer, before blending the layers together to get the jpg file. I am very new to this technique, so the dodging is not done as well as I would have liked, but this gives the impression of what it would have looked if I did.


Which do you think is preferable? The shadows cast by El Capitan itself and on its foot is ok, as I had visualized that when I shot it, intentionally placing it within the deep shadows.

I think in a full sized print, with the printer's larger color gamut and tonal range, the shadow would have shown some texture of the trees, though dodging would still bring out the details more.

Thoughts appreciated.

Friday, October 15, 2010

US National Parks: Yosemite Half Dome

The faces of Half Dome

Half Dome...another magnificent granite mountain...also a favourite of Adams...his most famous and endearing capture being Moon over Half Dome...a stunning photographic masterpiece.

The light plays games with Half Dome...the character or approachability of the huge mountain changes with the time of day, and time of year. In the day, the granite of Half Dome is forbidingly hard, imposing in stature and powerful. I made this shot from the Curry Village car park, shot in harsh daylight. I intentionally placed the trees in the foreground in Zone 1, making them mainly silhouettes, allowing the immense strength of Half Dome to force itself into the photograph.


Half Dome changes again, even in the same mid-day light. The next shot was taken from Mirror Lake, at the foot of Half Dome. We had seen a poster at our hotel in Mariposa, showing Half Dome, reflected on a pool of water, and had wanted to capture the same image. Mirror Lake was originally a small lake at Tenaya Creek between the peaks of Half Dome and North Dome. But artificial attempts to make a dam in the interest of an early tourism attraction in the late 1880s and mining of the sand caused sediments to accumulate, and the lake is close to disappearing. Only in the peak of spring and early summers, when the snow melt makes torrents of water come down the peaks is it a lake. Most of the time, as it was when I visited, it remains a dry sandy valley.

It was a hot day when I shot there...the lake bed threatening to bake me and my equipment. A little stream flows where a lake would have been in high water. Where I set up my tripod, during high water season, would be submerged under water some 1.5 to 2m, leaving only the very top of the boulder in the foreground above water..


I placed the shadows of Half Dome in Zone 5, and allowed the rest of the exposure to fall where it did.

But by evening, at sunset...Half Dome...the warmth and glow of the setting sun, makes the mountain look less forbidding...and a little more approachable. This shot from Glazier Point lookout. At an elevation of 7,214 feet (2,199 m), 3,200 feet (980 m) above Curry Village, looking directly into the face of Half Dome.


The golden light of the setting sun, creates a glow on the peak. Shot with the 120mm lens.

This next shot was taken just after the sun had set. Bathed in an eerie moonlight, of blue, almost lilac hues, the imposing mountain becomes even more approachable, pretty even. With this light, it is an almost frantic bid to capture the image before the entire scene plunges into darkness. I managed to get sufficient light to shoot at an exposure of 3s at f/16 only by pushing the digital back to ISO800, compared to ISO50 I have used for the earlier pictures.

I selected the 80mm lens, which shows a different magnification to the one above, but also a slightly different perspective...a more normal vs a compressed telephoto view to the former.

Tuesday, October 12, 2010

US National Parks: Yosemite Tunnel View

The US National Parks are quite remarkable places to visit. As I spent 2 weeks travelling two of the national parks - Yosemite and The Grand Canyon; driving some 3000 miles (4500km) with a good friend and fellow photographer: Prof Horolographer.

I am also starting this series of articles to document this trip, but also as a tribute to the late great Ansel Adams who inspired me with his images, as he did thousands of others. As a self taught photographer, I had "discovered" Adams in a book at the National Library some 25 years ago, and learnt quite a bit on visualization, equipment, etc. The book was called "The Camera". But, as recently as a couple of years ago, I started to be interested in landscapes and cityscapes. I had more than a fleeting, but on and off, interest in large format photography. I do admit, sometimes the view camera, with its almost infinite adjustments that had intrigued me almost as much as its promise of ultimate quality. That led me to stumble on another photographic hero: QT Loung at Terra Galleria. His blog found on his site is full of interesting snipets on how he made his beautiful photographs.

In the spirit of sharing that Adams and Loung had ably led, I also decided to make this series of articles a teaching series, to show how I made the photographs. I begin with Yosemite.

Yosemite is a landscape carved over millions of years by glaziers and water. Leaving the peaks of granite standing proud over the valley floor.

One of the many entrances into the National Park is via the Wawona Tunnel...and as one drives through the darkness of the tunnel, suddenly one is confronted with magnificence. A good friend of mine, who lives in Palo Alto highly recommended we try and get some pictures from this popular vantage point. We visited the lookout point twice. Once, immediately arriving to Yosemite.

It was mid-afternoon when we first got there. The place was crowded. Full of photographers and busloads of tourists. But as it was full daylight in late summer (we were actually a few days away from official Autumn), the light was not flattering, and the valley had a misty haze. I was told the Rangers practice controlled burning, and one such fire was somewhere near Bridalveil Falls, not too far away. I shot a few photographs, but as I had suspected, the light was unflattering, and decided against showing them.

We returned to Tunnel View Lookpoint on our last day at Yosemite, arriving just before sunset. Again, the place was full of tourists and other photographers...ranging from point and shoot cameras trying to take in the vast landscape. It amuses me that due to the failing light, and automatic nature of such devices, caused the flash to go off...in its own attempt to illuminate the grand landscape. But in our midst were also serious photographers. I spied one such character, with his Nikon D3, and long lens on his Gitzo tripod, peering deep into the valley.


The entire valley can be viewed from this vantage point. These peaks...the nearer and to the left is El Capitan 7,569 ft (2,307 m) above sea level, and some 3000 ft (910m) above the valley floor of Yosemite. And in the far center, Half Dome, some 8836 ft (2693m) of sheer granite. Slightly right, the last remainding whispers of water falling down Bridal Viel Falls can be seen.

Click on image for a larger 1920 wide image.


The light was extraordinary. The rays of the setting sun had bathed El Capitan and Cathederal Rocks in a warm, golden glow, but Half Dome in the far background was lighted in a different light...more blue, as they were more East, and the sun's rays have just passed sunset there, plunging it in the near full moon's light.

I wanted to capture the variable nature of this light, so the framing was settled...it had to be wide enough to cover El Capitan and Cathederal Rocks at the sides. I also wanted to include some of the trees at the valley floor...a la Adams in his winter exposure at probably the same spot. The Hasselblad HC4/28, which is a 28mm lens (approx 21mm in full frame 35mm) would cover this ground. I made a few photographs with this lens, but I also wanted to slightly compress the perspective from El Capitan and Half Moon, so I selected the Hasselblad HC4.120 Makro. This was a slight telephoto lens, with excellent near field ability, but also superb till infinity. The 120mm is approximately 91mm in 35mm full frame parlance, and had tremendous resolving power. In order to cover the framing requirements, I resorted to making a 3 panel stitch.

This light phenomena is a fleeting moment, lasting no more than minutes, and the photographer has to be ready, tripod in place, to shoot this as it happens. A few minutes later, and the entire landscape would be bathed in the bluish light which now envelopes Half Dome. In preparation, I had earlier looked up the moonrise and sunset times on the internet, and we planned to arrive about an hour before actual sunset. It would have been even more perfect if the moon had appeared behind Half Moon, but such was not to be, as the moon at that time was to the right of the frame, just behind Cathederal Rocks. From another vantage point - Glazier Point, it would have been visible, but Glazier Point was a bit behind Cathederal Rocks from this perspective, and from that point, El Capitan would not be visible.

I spot metered, placing El Capitan at Zone 8 (using Ansel Adams Zone System as a guide). This placed Half Dome in far center at about Zone 6, and shadows on the foreground of El Capitan Zone 1. I locked the exposure, and and shot 3 images in manual exposure mode as a panorama. And stitched the panels in Photoshop CS4. The lens was turned on its entrance pupil, which eliminates parallex errors.

As with the MBS images earlier, these stitched images are very large. This particular one measures 11388 pixels x 6491 pixels, printed full resolution at 300dpi, will measure some 40 inches wide, and 20 inches tall. Typically, images can be up-rezzed to double the full dimensions, so a 80inx40in photo is possible with no loss of resolution or clarity. Due to the exceptional resolution of the 39 Mpx back and the 120mm lens, the detail captured is astounding.

Prints of this and other images are available as fine art prints. Please contact me for details.

Friday, October 8, 2010

Scenes from Singapore: Marina Bay Part 3

And a bit more spectacular:

Eight panel horizontal stitch with HC2.8/80. The camera is mounted on the Manfrotto macro rail, set such that the point of pivot is exactly at the entrance pupil of the lens...as defined by Hasselblad to be 79mm in front of the sensor position at infinity focus. Focus is set manually, as is exposure. This shot from one of the pods off the Helix Bridge.


The full resolution photograph is some 1GB in size, and will easily print to 8 m width without loss in resolution. Stitching done in CS4.


Seven panel horizontal stitch using HC2.8/80. This shot just outside the concourse of the Shoppes at Marina Bay.

A single shot using same lens showing the Shenton Way skyline.

Wednesday, October 6, 2010

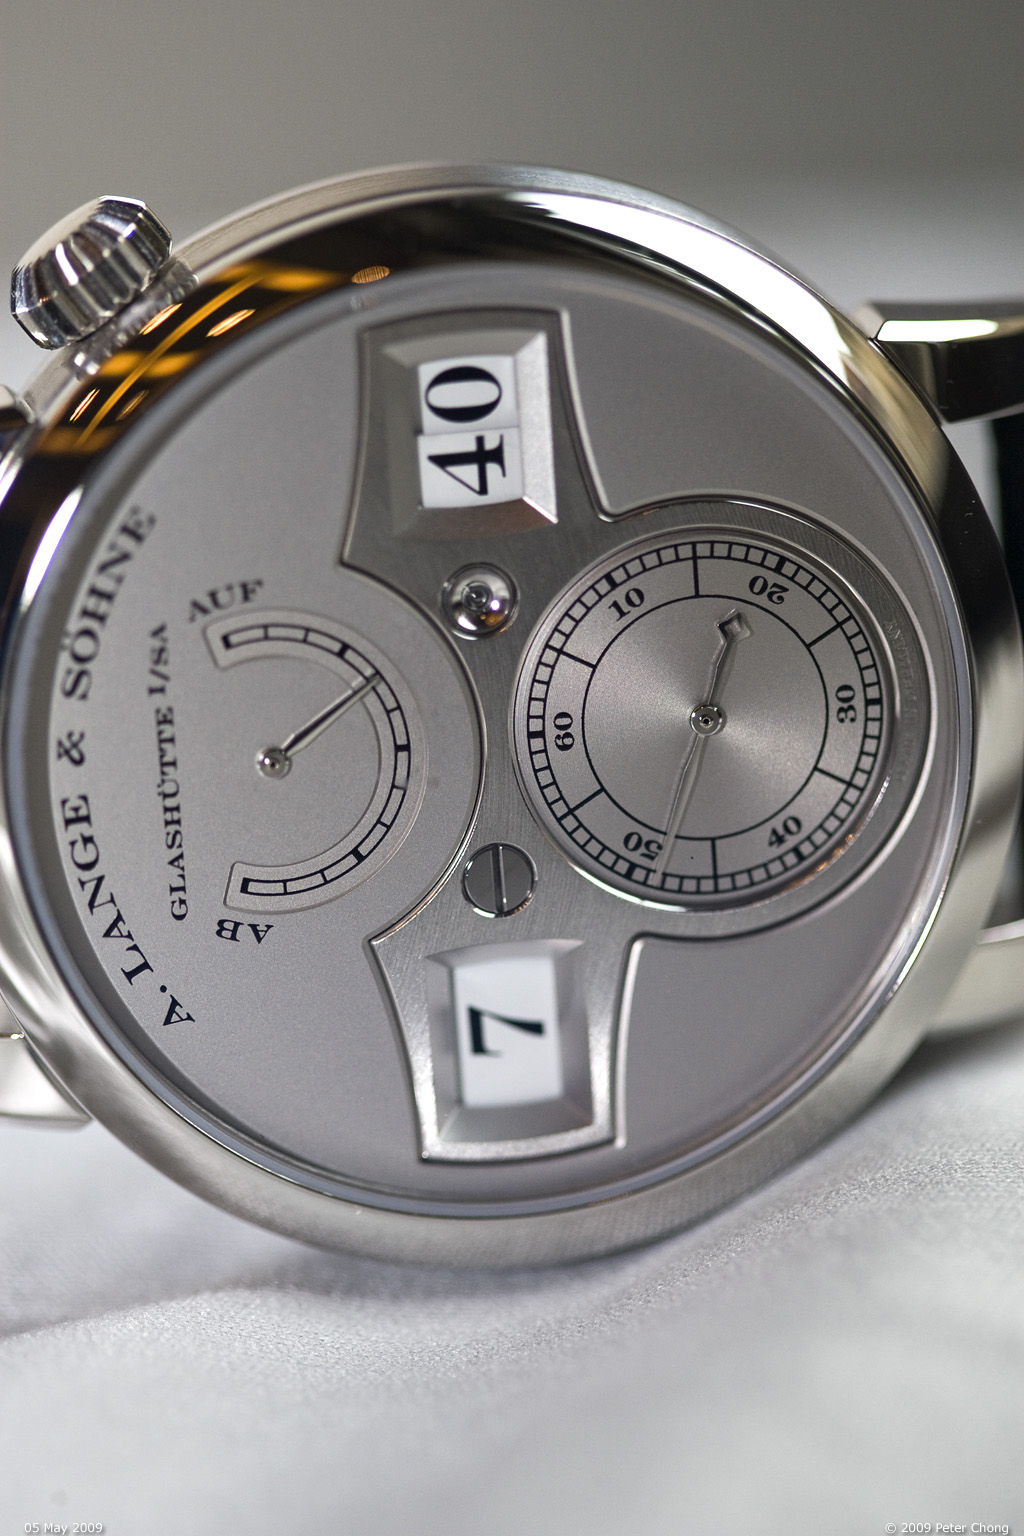
Flashback: Berlin Launch of ALS Zietwerk

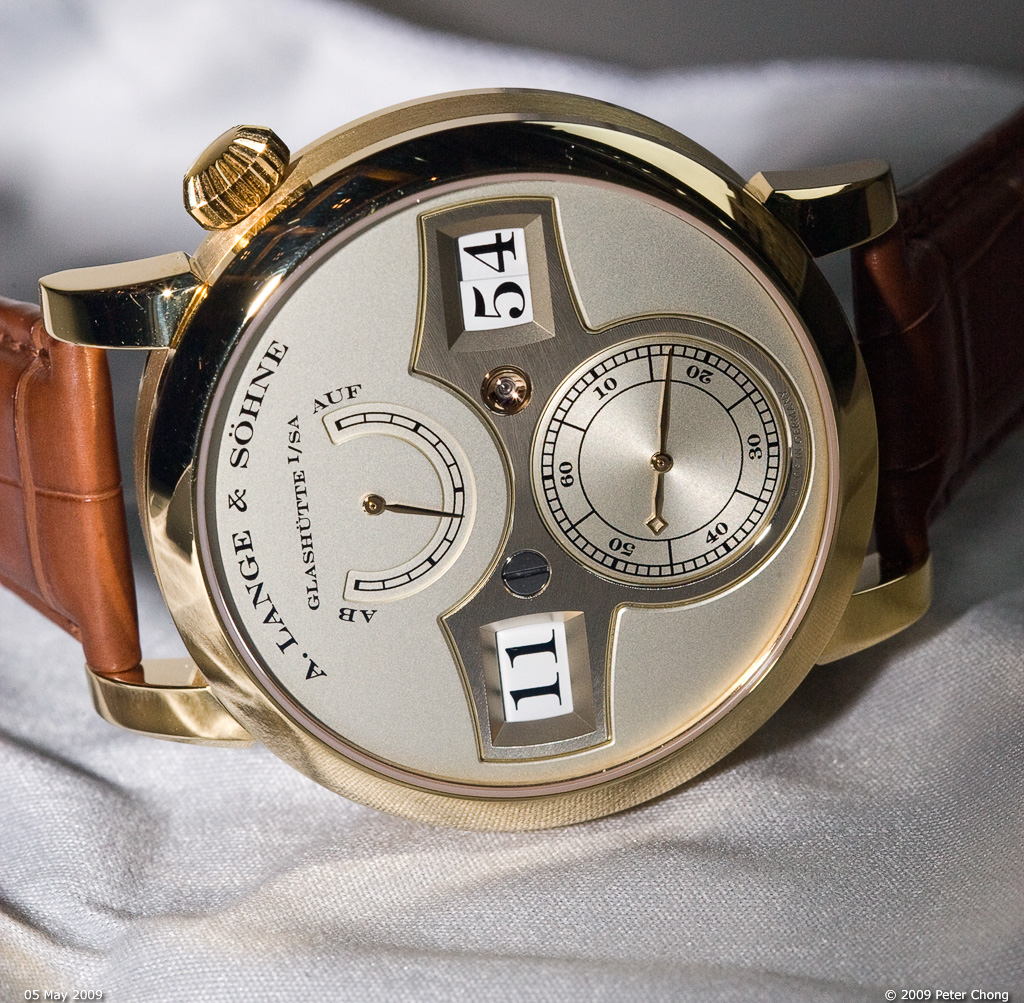
The New Lange - Zeitwerk

Zeit in German meaning time
werk meaning works


October 1994, the Lange 1 burst into the scene and announced to the world that the Germans have arrived. The tour de force illustrated by the Lange 1, the Pour le Merite Tourbillon shook the world of horology. It was never the same again…the Swiss now have to be aware of the competition coming from their north.

Fifteen years later, Lange once again proved that they are the leaders. In a year of financial turmoil, they have showed their prowess by not launching one highly significant horological product, but two. In a year where many manufactures are holding back their significant pieces, Lange shows the way with two. They will also be delivering the Lange 31 and by year end, the second tranch of the Tourbograph in a new precious metal.

The Richard Lange Pour le Merite in enamel dial with fusee and chain announced in SIHH in January this year was joined by the Zeitwerk which was launched in a beautiful event in Berlin.


I had earlier shown the teaser above…the uncropped image is as below, and would have given away the fact that the new watch had no hands…ok…it had a huge seconds hand, but it was not apparent in this picture.


The new watch is the new face for Lange, leading the way to the next generation…in Fabian Krone’s invitation, he hinted that this will be a big jump in horology…if you look back at my hints, I used this several times.


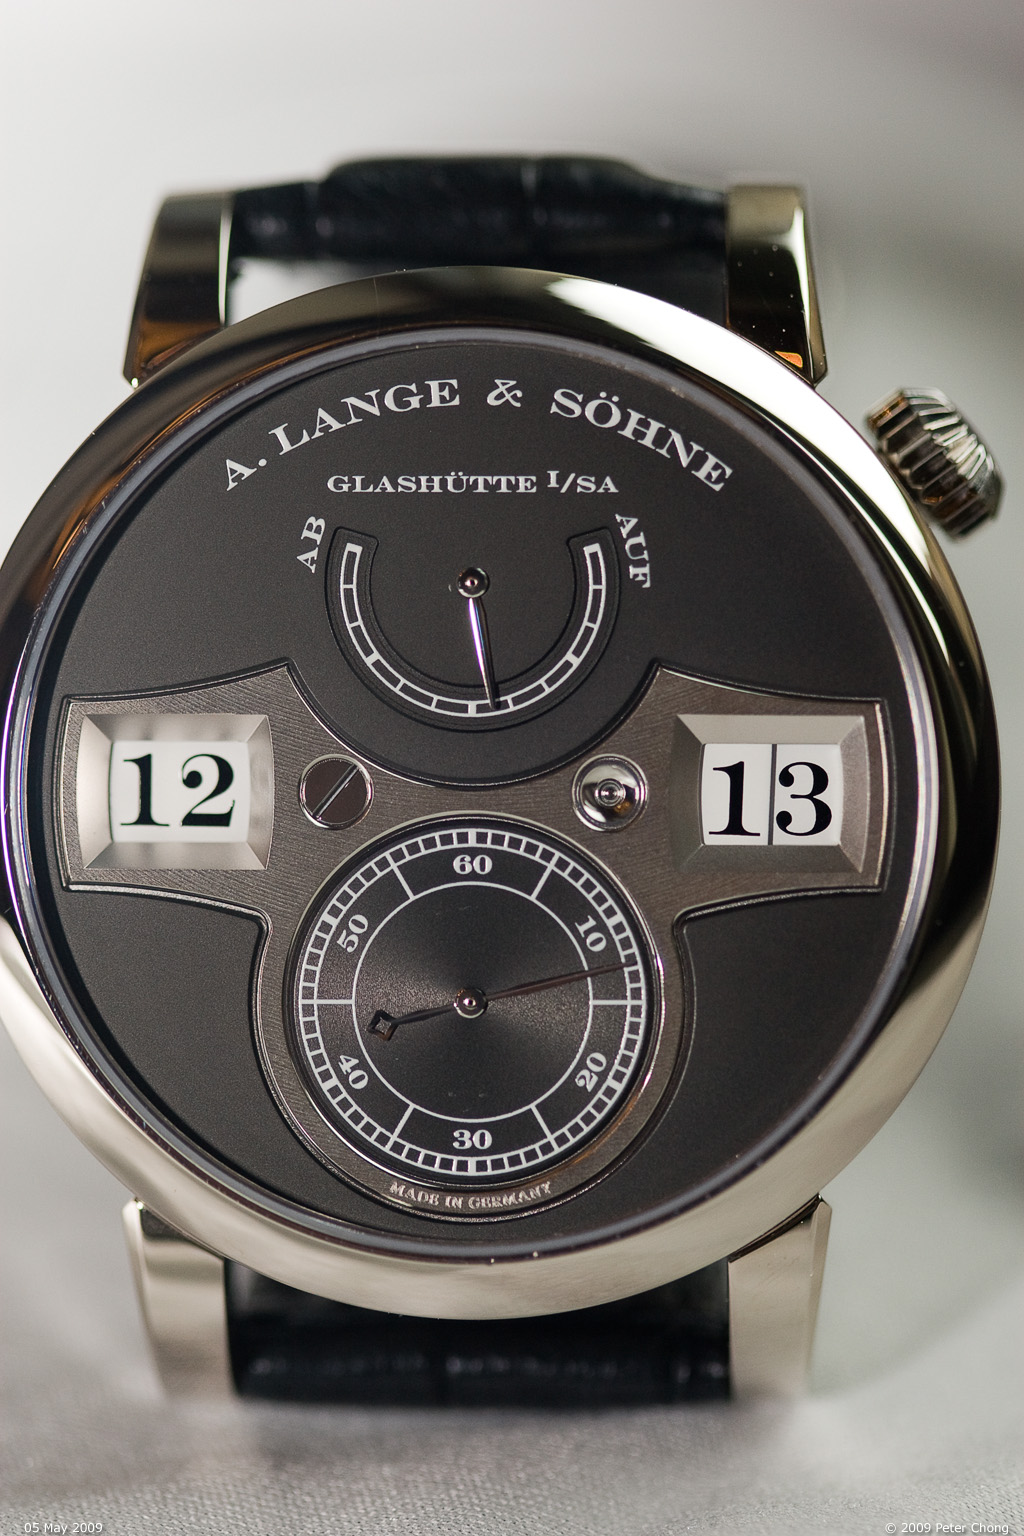
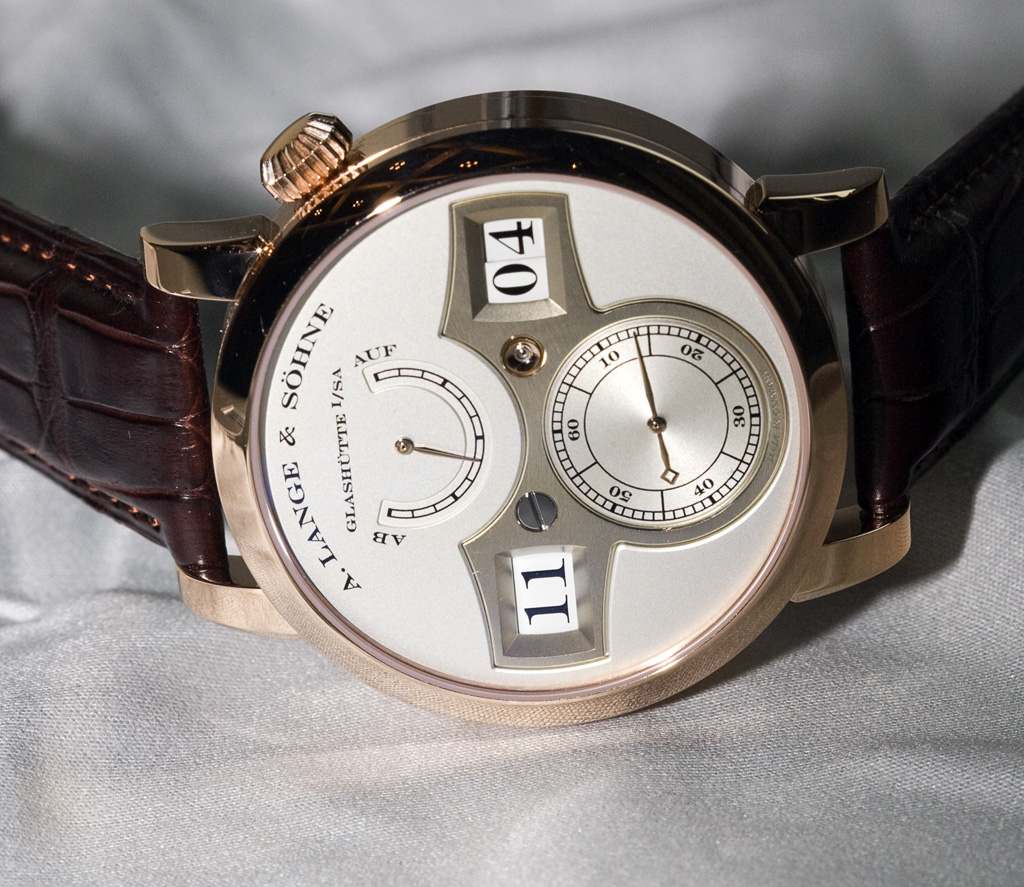
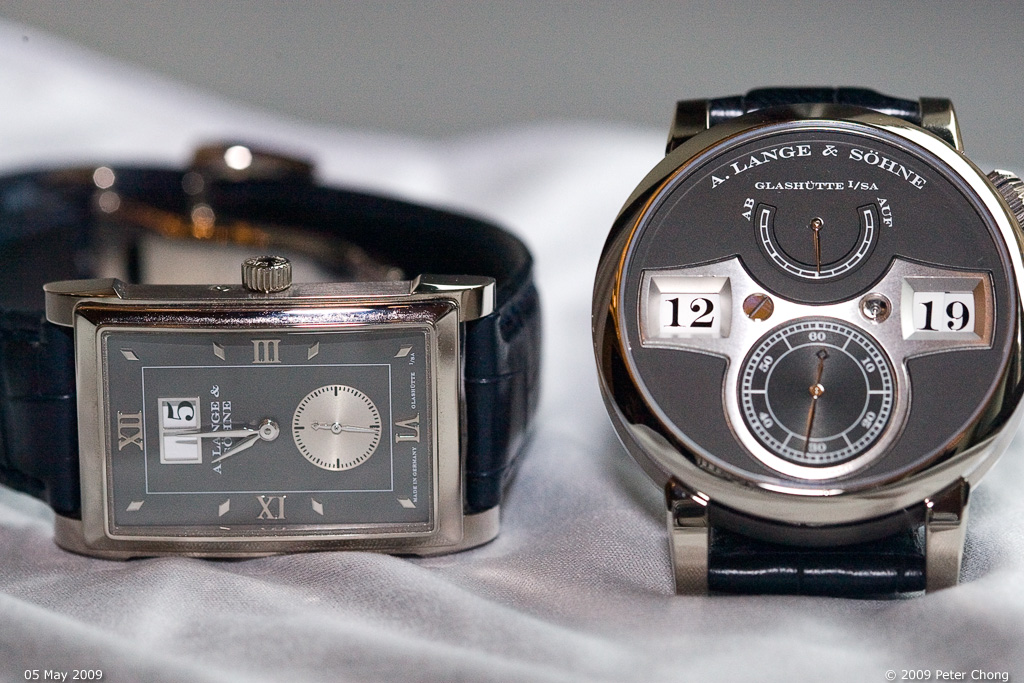
So what’s so special? Starting from the design language, this is the first digital mechanical watch with such large digital display, and which is laid in a line across as one would read the time. Others seem to be arranged vertically, and typically the digital displays are smaller.

Also, a bold frame in German Silver frames the huge jumping displays. BTW, these are early prototypes, the alignment of the disks would be adjusted in the final product so they are totally alighed.


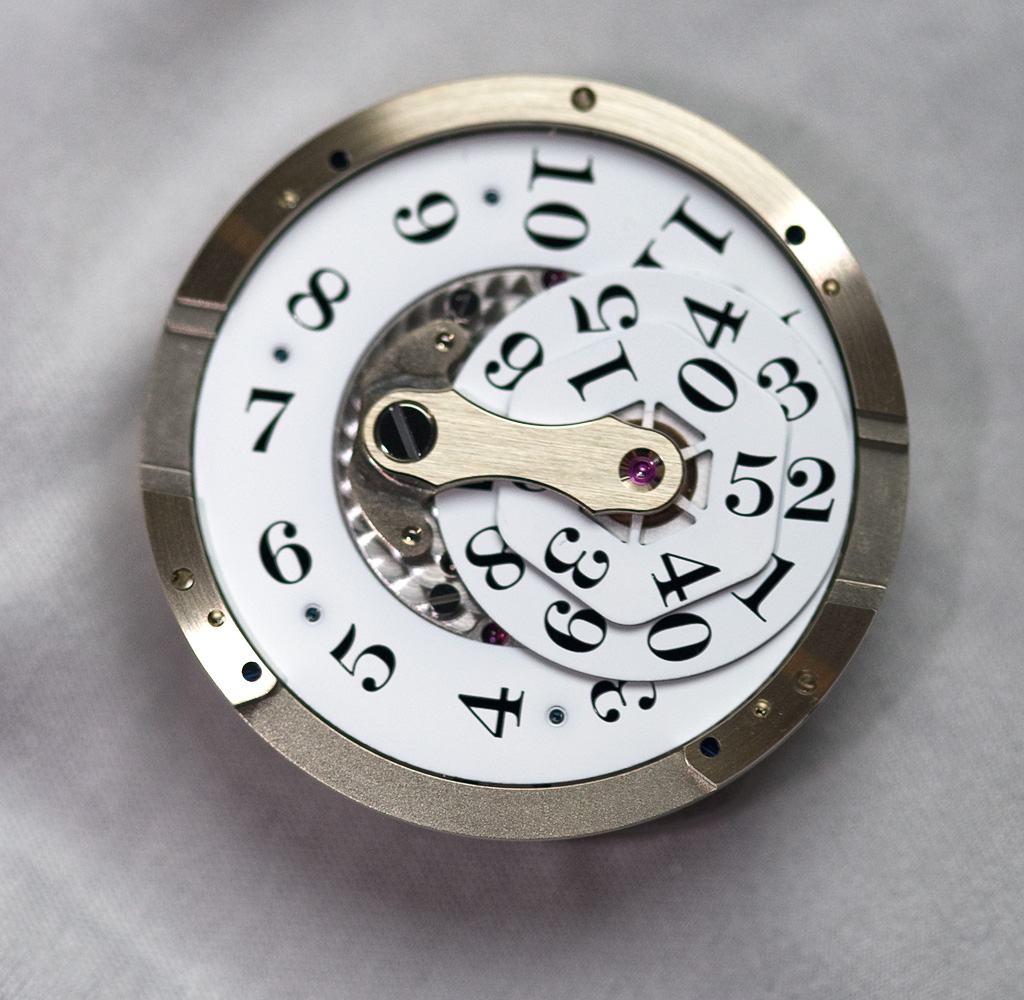
Next the movement, of course is special. Not only is finished in traditional Lange style, it is fitted with a constant force mechanism which provide a constant force to the balance and improves timekeeping but also powers the jumping mechanism of the digital display.


A new patent was registered for the digital display – the way led by the Lange 1’s large date, the time display is huge.


The time change occurs quickly, on the dot when the seconds hand hit 12, and instantaneously. In time setting mode, turning the crown forwards also effect this change instantaneously, and backwards will cause the time to jump back instantaneously.


Short movie on jumping at 11:59.


Housed in a magnificent case measuring 41.9mm in diameter and 12.5mm thickness lies the movement – Caliber L043.1, itself measuring 33.6mm in diameter and 9.3mm in height…and as usual for Lange, no movement ring is required…the movement is fitted right inside the case. The case is available in 4 metals – WG, YG, RG, Platinum. Each with its own dinctitive dial – black for WG, argenté for PG, champagne for YG, and rhodié for Platinum.

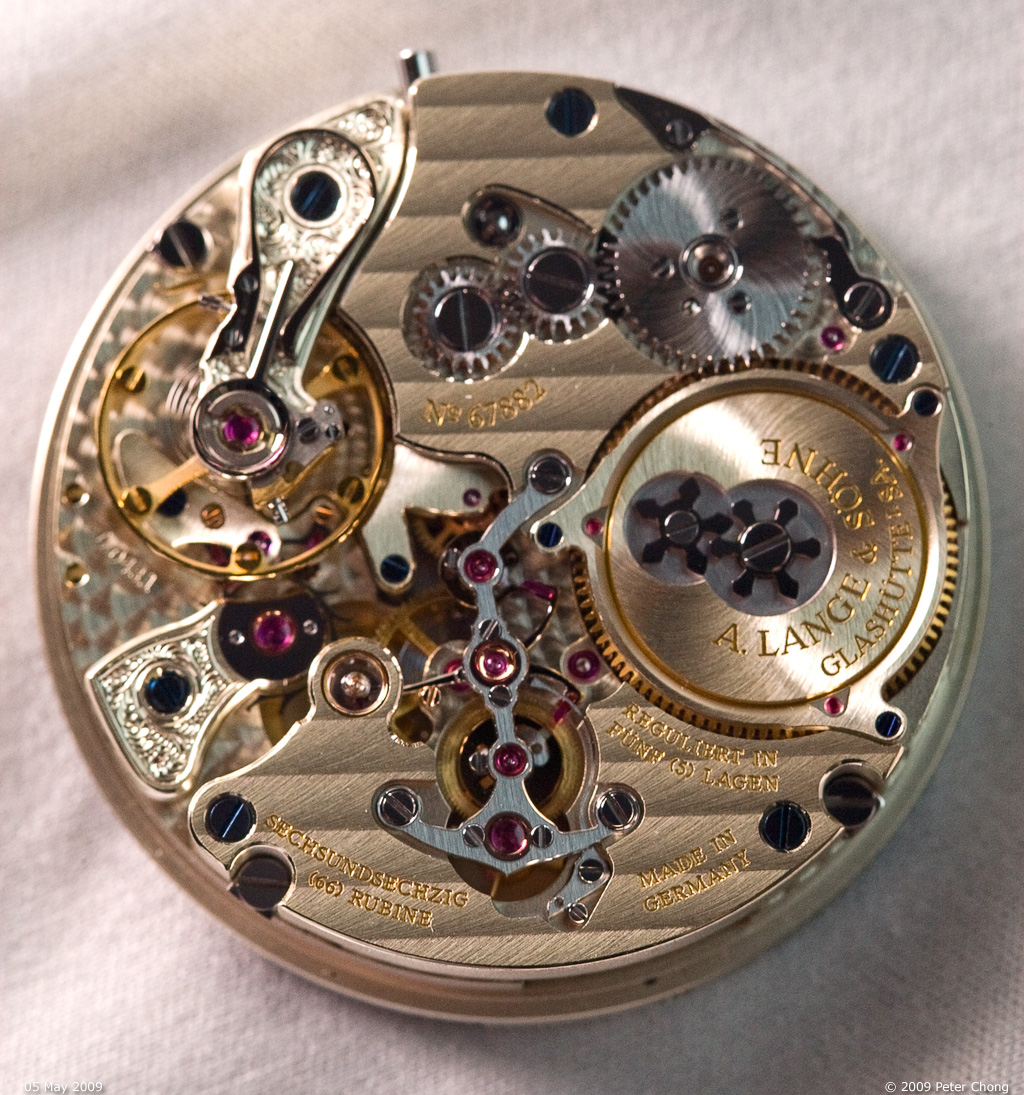
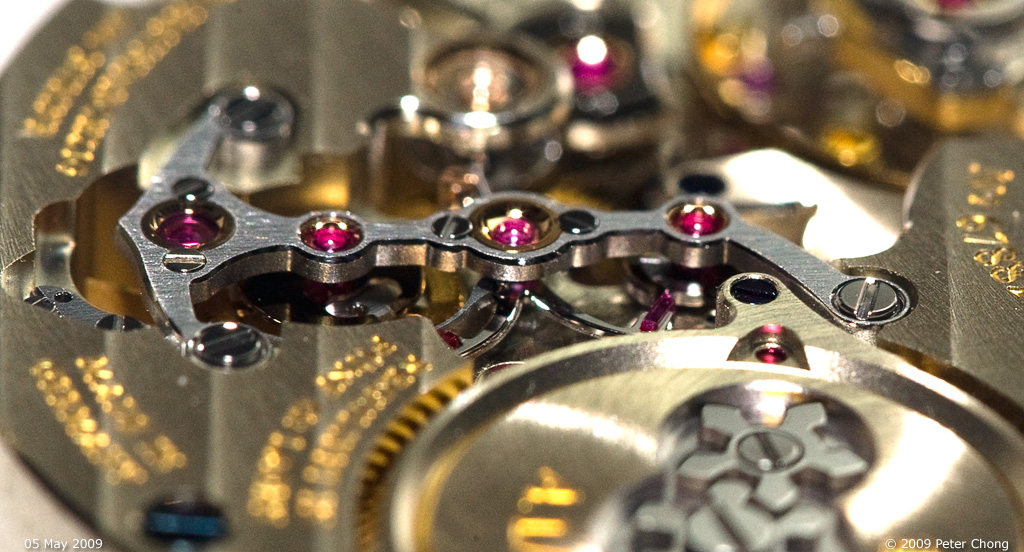
The movement…out of the case


In order to move the massive disks, a huge amount of power is required. And to supply this power, a very thick mainspring is used. This mainspring provides more torque than the Lange 31. Its shorter but thicker than the 31 spring.

If you remember the technical discussions on the Lange 31, the power of its mainspring is so strong that it will cause instantaneous and massive overbanking of the escapement. The problem was solved in the 31 with a remontoir, which is rewound by the mainspring once every 10s. And the small remontoir spring supplies near constant force to the escapement.


The bridge of the remontoir palet.

The same principle used to tame the power of the mainspring and also to provide constant force to the escapement. The remontoir is slightly different, and indeed carries a patent. This remontoir recharges once a minute, which suits the jumping mechanism just fine, as with each recharge instantaneously every minute, drives the jumping mechanism.

Movement has 66 jewels, 388 parts, and 2 gold chatons. 36 hour power reserve.

Part 2 of this report will be the technical discussion on how the remontoir works…fascinating stuff…so please stay tuned.

Tuesday, October 5, 2010

Scenes from Singapore: Marina Bay Sands Part 2

Followup to the Marina Bay recce trip using the LX3, here are some pictures from the Hasselblad shoot.


Later that evening, feeling more gung ho, so attempted aAhand held shot of the Marina Bay Sands Hotel. Note to self, don't shoot the Hasselblad handheld.


Inside view of the Shoppes:

Friday, October 1, 2010

Hong Kong: A short series

Shot with a Mamiya 7 II with 43mm lens. This is a truly superb rangefinder camera. Shooting 6x7 film. Scanned with a Hasselblad 343 drum scanner. I didn't do much touch up on the scratches to the film. These appear as white dots, or scratch lines on the film, and is quite common, especially when not stored properly.

Both camera, lens and scanner have amazing resolution and colour fidelity.

Shot from a flat up 28 storeys in Hung Hom.


The DOF of the 43mm lens is amazing. And the depth of detail is very high.

Same camera, lens. Outside the Peninsula Hotel:


Inside, using Kodak Tri-Pan X black and white film for a grainy period look.


Same setup outside the IFC, across the border